
Protein bars have become a must-have for anyone who takes health and fitness seriously.
They don’t replace meals (and they aren’t intended to), but they do provide a convenient way to top up your protein levels and satisfy your appetite too.
There are plenty of ready-made protein bars on the market and some of them are very good indeed, but there are three good reasons for making your own.
One it’s fun. Two it cuts the cost and three it puts you in total control. Let’s look at these points one at a time.
Looking for protein to put in your bars? See our best whey protein powder reviews here
Quick Jump To Recipies
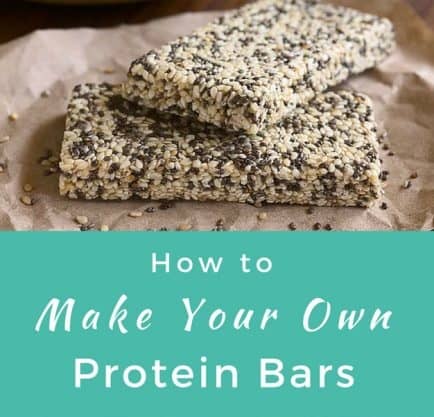
Making your own protein bars is easy and enjoyable
If you can make basic recipes like crispy cakes and pancakes, you can make your own protein bars.
There are loads of recipes on the net, we’ve included four below, three of which are really easy and while the fourth is a bit more complex it’s still very simple.
Once you get into it, you’ll find you don’t even need a recipe, in fact we can tell you the basic principle behind making protein bars right now.
Pick your favourite protein powder and add your choice of flour or grain to it.
 If you want to make “no bake” protein bars then you need to choose one which can be eaten raw.
Porridge oats appear in many recipes because they’re healthy, full of fibre, filling and affordable, but there are plenty of other options such as superfood quinoa, coconut flour and almond flour.
As with everything else, the ratio is up to you, but if you’re looking for guidance, we’d suggest a 1:1 or 2:1 ratio of carbohydrate to protein.
Add any flavourings you like.
Obviously, it’s good if they bring something to the bar, hence the popularity of ingredients such as nuts and seeds, but it’s entirely up to you.
Again, if you’re using the “no bake” approach, you need to use flavourings which can be eaten raw, but there’s still plenty to choose from!
Bind with a liquid.
In principle, you can use plain water, but you generally want to use a liquid with some sort of flavour, common choices are dairy milk, soy milk and/or nut milk.
Basically, you really can’t go wrong here, you’re just adding liquid until your mixture is soft enough to form into bars.
If you add too much liquid, just top up the dry ingredients and if you go too far in that direction add some more liquid.
Shape into bars.
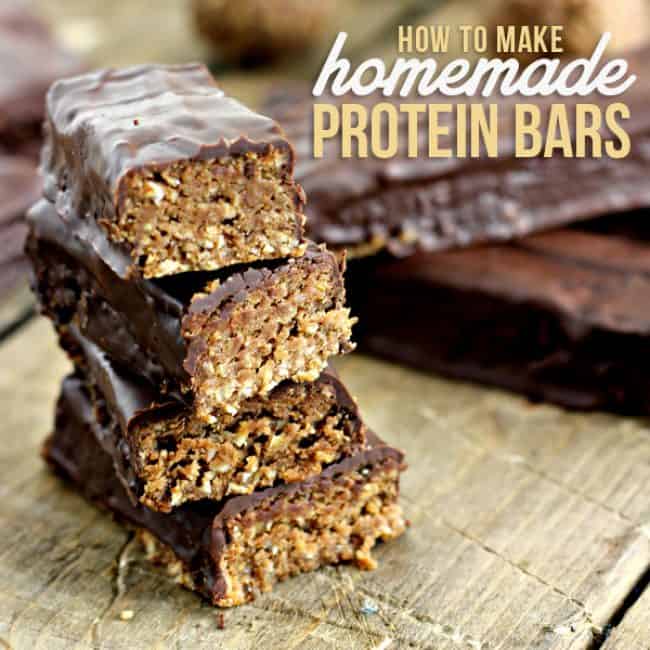
If you choose (and we do recommend it), melt some chocolate and cover the bars with it. Again, what chocolate you use is entirely up to you, but we’d say be guided by the sweetness of your recipe.
If you’re using lots of sweet ingredients then it’s usually best to use a strong, dark, chocolate, but if you’re making a recipe with less natural sweetness, then you might want to treat yourself with sweeter chocolate.
Freeze for at least 30 minutes and then put in the fridge or just put straight in the fridge and leave them for at least four hours.

Making your own protein bars is very economical
The old saying “you get what you pay for” applies as much to protein bars as it does in just about every other area of life.
In the case of ready-made protein bars, you’re not only paying for the convenience of having someone make your bars for you and deliver them to a nearby store (or even to your door), but you’re paying for all the corporate expenses which go along with that and the marketing and advertising which may well have brought the brand to your attention in the first place.
Even low-grade protein bars can work out a lot more expensive than making your own good ones and the top-quality bars carry equally premium prices.
In short, given how easy it is to make protein bars, from a financial perspective, it’s really hard to argue with the advantages of making your own.
Making your own protein bars puts you in total control
Let’s spell this out a bit at a time.
First of all, you know exactly what the ingredients are. As we’ve previously mentioned, there are a whole lot of protein bars on the market and, bluntly, some of them are just exploiting the fact that a lot of people want to do what is healthy, including eating healthily, but don’t necessarily really understand what that means.
They’ve heard of the benefits of protein, see something advertised as a protein bar and assume that it’s going to be good for them.
They don’t even necessarily understand how to read a label and certainly not to find their way past some of the legal but misleading labeling seen out there.
Secondly, you know the quality of the ingredients. You bought them.
This picks up on the point we made earlier, but let’s make it even clearer.
You could pick up two shop-bought protein bars with exactly the same ingredients list and one could still be massively better for you than the other due to the quality of the ingredients.
For example, the protein powder market suffers from exactly the same issues as the protein bar market, namely it’s full of “cheap and cheerful” powders, which again are just catering to people who basically don’t really know any better.
Look online and you’ll find brands which are essentially low-grade protein plus tons of artificial sweeteners right up to the premium brands trusted by those in the know and a whole lot in between.
If you make your own protein bars at home, you know exactly which protein powder you’re using and what it’s quality is, but if you buy from a shop, then you only have the manufacturer’s word for it.
Thirdly, you can make your own protein bars exactly how you like them. Ring in the changes with different flavours or protein powder.
You’ll see vanilla and chocolate used over and over again in recipes (in fairness, largely because pretty much every manufacturer does those flavours) but there’s no law says you have to stick with them.
Play around with seeds and nuts.
These days, chia seeds have made their way into a lot of recipes and that’s totally understandable, but how about flax seeds or hemp hearts?
Likewise, while peanut butter is often used, for widespread availability and affordability and almond is a close second for its gorgeous flavour, you can try cashew or, indeed, anything else you like, or mix them up.
If you have a sweet tooth add honey or if you see honey in a recipe and you don’t have it or don’t fancy it, swap it out for something a little different like agave or golden syrup or add butterscotch or dried fruits (in the latter case, you’ll probably need to increase the quantity of liquid).
Four of our favorite protein bar recipes
Now that we (hopefully) have convinced you at least to have a go at making your own protein bars, here are four recipes to get you started.
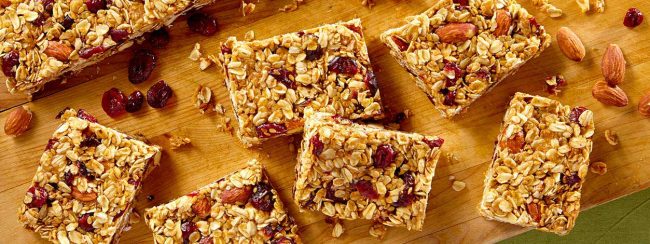
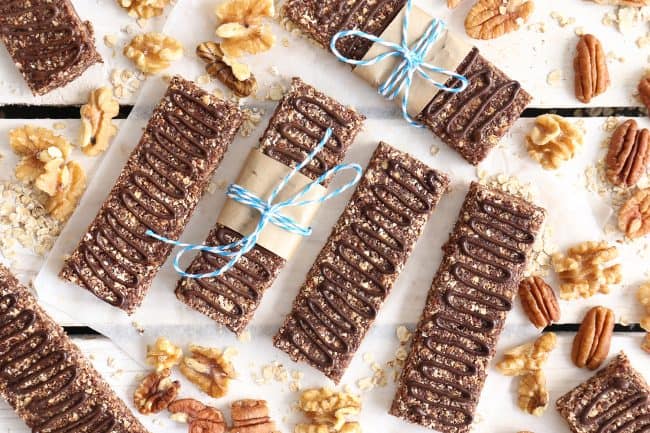
The Nutty One - Protein Bar
Now I've got a confession, as you can see from the image I added a granola mix into the below. A) because I love Granola and B) because I love... no seriously, just because I make this recipe all the time I love it so much but I have the granola and I thought oh what the hey, So I put it in and I'm eating it now as we speak and yup, it tastes just as good
Ingredients:
300g porridge oats
2 tbsp. chia seeds
75g chopped almonds
60ml coconut oil
75g almond butter
2 tbsp. chocolate protein powder
Directions:
- Mix the coconut oil, almond butter and protein powder until it is smooth and creamy and then add in the oats, chia seeds, and chopped almonds. Keep mixing as you go so you get a smooth batter.
- Lightly grease a 20cm square baking dish, pour in the batter, smooth it and press down to release any trapped air. Cover the dish with baking paper and leave in the fridge for at least four hours before cutting and starting to eat. Keep bars in the fridge until used up.
Read our review of the best Casein protein powder here

Vanilla, Peanut Butter & Chocolate Protein Bar
Ingredients:
600g porridge oats
75g vanilla-flavored protein powder
2 Tbsp chia seeds
1 tsp ground cinnamon
1/4 teaspoon nutmeg
1/4 tsp salt
75g cup peanut butter
75g honey
120 ml almond milk
1 tsp vanilla extract
150g chocolate chips
Directions:
- Preheat oven to 175 degrees C/Gas Mark 4.
- Lightly grease a 20cm square baking dish
- Combine the oats, protein powder,chia, cinnamon, and salt. In a separate bowl, combine the peanut butter, honey, almond milk, and vanilla extract. Slowly add the liquid to the dry ingredients, stirring continually so that everything combines well. Add the chocolate chips and again stir to combine well.
- Transfer the mixture to the dish and smooth it as much as you can. Press down to release any trapped air and bake for about 20 minutes until you see that the edges are a nice golden colour.
- Let the mixture cool in the dish then cut and store in the fridge.
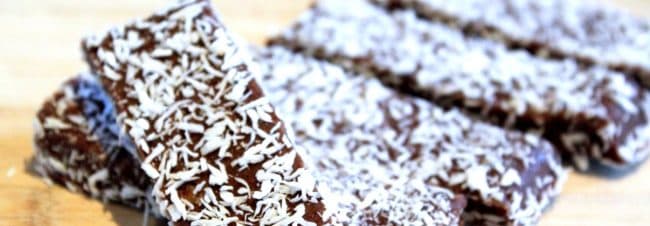
Coconut and vanilla bars
Ingrediants:
150g vanilla protein powder
75g desiccated coconut
75g coconut flour
60ml milk (any sort dairy, soy, nut…)
30g chocolate - again you can use whatever you want but there is a lot of sweetness already in this recipe so we suggest you offset it by going for really dark chocolate.
Directions
- Mix the dry ingredients, then add the milk slowly until you get a dough you can shape with your hands.
- Shape the mix into bars.
- Melt the chocolate, either put it into a glass bowl on top of a pot of boiling water or give it some short bursts in a microwave. Dip the bars in the chocolate and then put them in a freezer-proof container or put the bars in the container and then just pour/ladle over the chocolate.
- Freeze for at least 30 minutes then put in the fridge.

Banana Chocolate-Chip Protein Bars
Makes 12 bars
Ingredients:
150g honey
150g nut butter (we suggest almond, but if you’re stocked up on ordinary peanut, that’s fine)
150g boxed coconut milk
75g vanilla protein powder
1 tablespoon sunflower or vegetable oil
1 teaspoon vanilla extract
300g porridge oats
600g crisp cereal
150g sliced almonds
150g dried banana chips, roughly chopped
150g mini chocolate chips, separated
1/2 teaspoon salt
Directions:
- Lightly grease a 22cm square baking dish and set aside. Preheat oven to 175 degrees C/Gas Mark 4.
- Combine the honey, almond butter, coconut milk, protein powder, sunflower oil and vanilla over a medium heat until the mixture is well blended and just starting to bubble (this will only take a couple of minutes). Set aside (off the heat).
- Combine the oats, cereal, almonds, banana chips, half the chocolate chips and the salt. Make sure they all thoroughly mix together. Pour the liquid over the dry ingredients, stirring continuously until everything is combined.
- Put the mixture into the baking dish, cover it with baking paper and press down firmly. Bake for 15 minutes. Use the rest of the chocolate chips for topping. Allow to cool completely before cutting.
Conclusion - Making Your Own Protein Bars
At this point in time, we’d guess the main reason for many people trying their hand at making their own protein bars would be the fact that they’re so affordable when compared to the shop-bought ones and we certainly see that as a major benefit.
At the same time, however, even when budget isn’t an issue for you, we think there’s a lot to be said for having total control of what you eat, even if it’s only to ensure that your food tastes just the way you want it to, because it is important that you enjoy what you eat.
Those on special diets can also spare themselves the hassle of having to peer at labels to ensure that the bars they buy are suitable for their needs. We also think that making protein bars is just good, old-fashioned fun.
In our experience, many people do actually enjoy making their own protein bars once they give it a go.
As a final tip, home-made protein bars can also be a great gift for a health-conscious friend (or maybe someone you’d like to nudge gently and tactfully in the direction of healthier eating).
We also have a review guide here of the best bars you can buy if you want a quick solution

Fitness fanatic and always on the move. Carly is a certified personal trainer and currently teaches spin class, Zumba, and Body Pump amongst a few others. Carly has a PhD/MSc in Sport and Exercise Nutrition so she really knows her stuff and has worked in fitness and health all her life. We are honoured to have her as a member of the team. Carly has an infectious laugh, loves terrible, terrible jokes and her dog Trevor and often works with a local mental health charity


Recipe number 2 seems to have a lot of porridge oats – 600g! Is the the correct amount? I’ve just made it (haven’t tasted it yet as it’s still in the oven) and have added double the amount of milk as it seemed too dry.